Tuesday, July 15, 2014

Chocolate-Dipped Variety Plate

Chocolate-Dipped Variety Plate


Ingredients
Chocolate of your choice – milk chocolate, dark chocolate, bittersweet, semi-sweet, etc.
White chocolate (If you want the pretties)
Stuff you’re going to dip into chocolate (fruit, marshmallows, s’more sandwiches, pretzels, cookies, bacon, anything you want, really.)

Fruit (any kind you want dipped in chocolate, but fresh is always best)
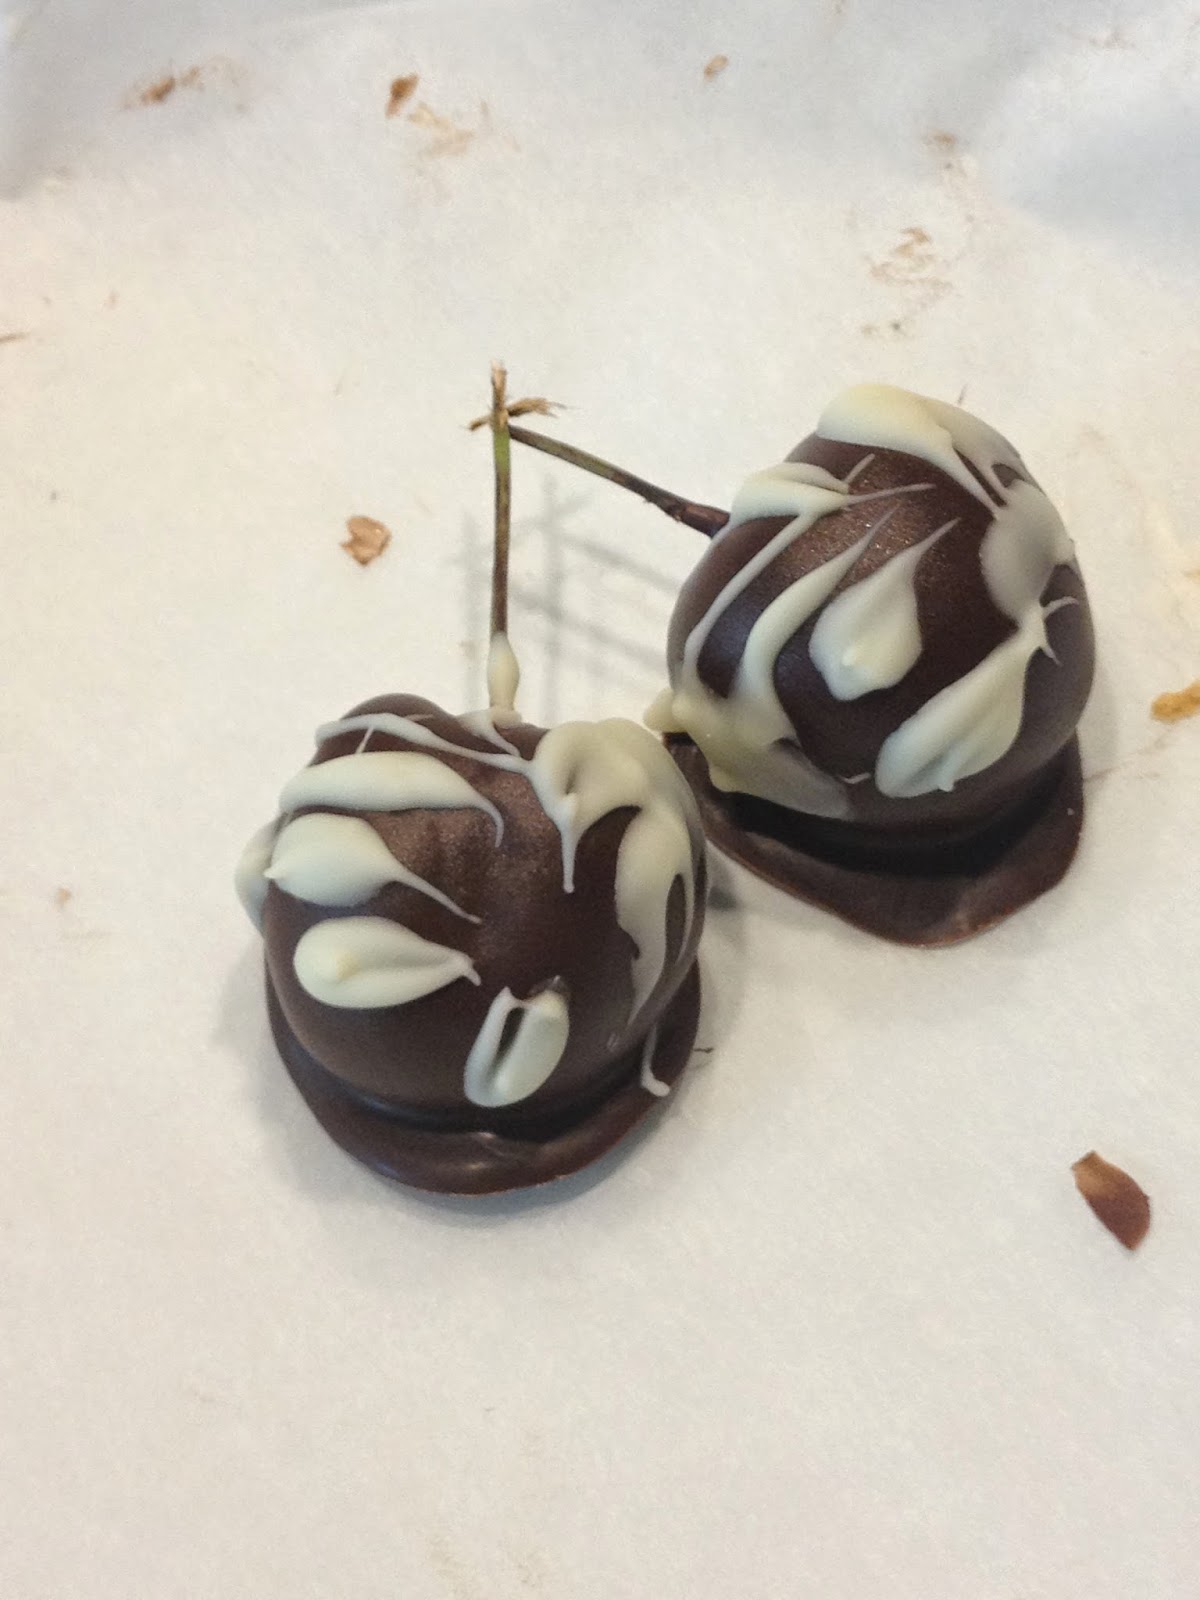
Fresh cherries
Fresh strawberries (giant strawberries are not ideal – the flavor is less concentrated and you will have a smaller surface to volume ratio – more strawberry, less chocolate shell!)
Fresh blueberries
Toothpicks (round, pointy ends)

S’more Sandwiches
Original graham crackers
Marshmallows (I used flat stacker marshmallows)

We can break this project into four steps.
I’ll talk about how to melt, dip and set the chocolate shell.  Then I’ll get into how to make the S’more sandwiches you’ll be dipping, and then how to prepare the blueberries for dipping.  Finally, we’ll cover how to make your chocolate creations even prettier with white chocolate accents.


Dipping things into chocolate is almost criminally easy.  Melt, dip, chill for 15-20 minutes to harden and set.

Chilling in the fridge
  1. Simply place your desired chocolate in a microwaveable bowl.  You’ll want a bowl that is deep enough that you can dip your treats in to cover, while still being wide enough to get your treats into the chocolate.  I used a one cup Pyrex measuring bowl.
  2. Take about six to seven ounces of chocolate (chopped roughly or broken into chunks), and microwave in intervals of 30 seconds, stirring in between bursts until the melted chocolate is smooth and all the chunks have melted away.  Take care not to burn the chocolate!
  3. Spread out some parchment paper on your counter top – this will cut down on mess.
  4. Think about how many treats you want to dip, and then line a plate with parchment paper that’s large enough to hold your treats.  If it not big enough, that’s okay.  You can work in batches.  The key is to have some room in your fridge for the plate you’ll chill your dipped treats on.

  5. Now that you’ve got your plate ready, dip your treats into the chocolate, let the excess drip off, and then place on the parchment paper-lined plate.  Repeat until your plate is full, or you’ve run out of treats.  Make sure to space your dipped treats so they’re not touching, and so the chocolate off-drip does not touch either.
  6. As you dip, if you’re running low, you can melt more chocolate.  If you’re running low on both chocolate and undipped treats, go ahead and just smear the outside with what’s left.  All you need is a chocolate coat – it doesn’t have to be dipped!
  7. It’s helpful to leave a small part of the treat undipped to serve as a handle – less chocolate will melt on your hands.  If using fruit, keep the stems on, and you’ll be fine.
  8. Place the plate in the fridge for 15-20 minutes to let the chocolate harden and set.  Once you’ve done that, you can peel the treats off the paper, and the chocolate will stay hard!
  9. I recommend keeping dipped fruit in the fridge, but nonperishables will keep fine in the pantry.


Blueberry Skewers!
  1. Spear four blueberries on one end of a toothpick, with that end only just poking past the end berry.  You don’t want to lose a berry in the chocolate!
  2. Dip the skewer in chocolate, let set.

S’mores Sandwiches

  1. Break the crackers into rectangles, two for each sandwich.
  2. Line a baking sheet with parchment paper.
  3. For each sandwich, place one cracker piece on the tray, add one marshmallow on top.
  4. Put the tray in the oven, and broil until the marshmallows are golden to dark brown.  Watch the oven carefully so they don’t burn!
  5. When you’ve toasted the marshmallows to your liking, remove from oven and allow to cool until the marshmallows are slightly firmer when you poke at them.
  6. Take the top cracker, smear with melted chocolate, and gently smush on top of the marshmallow.  Let the baking tray cool, and then put in the fridge for 15-20 minutes to let the chocolate mortar set.
  7. Dip in chocolate, put back in fridge for 15-20 minutes to harden and set, and your chocolate dipped s’mores are done!
White Chocolate accents


  • To add a fancy element to your treats, melt white chocolate and decorate as you like.
  • For the strawberries and cherries, I make sure the white chocolate is melted and liquidy, and then use a chopstick end to decoratively drizzle white chocolate on the dark chocolate shell.
  • I dip the end of the blueberry skewers with white chocolate.  I do this at the end, when the chocolate has cooled enough that the darker chocolate will not melt on contact.
  • Once you’ve added your white chocolate accents, chill to set as usual, and enjoy.


Wednesday, July 9, 2014

Door County Style Cherry Bounce

My mother's side of the family comes from Door County, in Wisconsin - the cherry capital of the US.  Naturally they've figured out how to cook cherries every which way.
Our particular favorite is cherry bounce, a sweet boozy drink.

This recipe is very simple, from my mother's cousin, who owns a cherry orchard.

Door County Style Cherry Bounce

2 quart mason jars
1 quart brandy
1 cup sugar
lots of cherries (a bag?)


  1. Wash out your mason jars and allow to dry.
  2. Combine brandy and sugar, whisk and heat over low heat, just enough to dissolve the sugar, no more.  You don't want to boil it - just get the brandy clear to the bottom, and you're done.  Let it cool, then divide between the two mason jars.
  3. Toss pitted cherries into the jars until full to the brim, seal.
  4. Let the mix sit in a cool, dark place for four months.  If you're making this in July, it will be ready by Thanksgiving!

Tuesday, July 1, 2014

My Zuni-Style Roast Chicken

I’ve tried roasting chicken Zuni-cafĂ© style before and the results were spectacular.  The steps are fussy and you need to start preparing at least one to two days in advance.  But none of it is difficult.  I had no problems at all even on the first attempt.
But my brother and sister, younger sibs both, were off studying in Columbus at OSU when I made Zuni chicken the first time.  I wanted to share it with them.  That’s what my family does, you see – share good food.

I’ve adapted this recipe from three different sites, with my own alterations, of course.
You will need one or two chickens, depending on how many people you’re feeding.  One chicken ought to feed three or four people.  Each chicken should be 2.75 to 3.5lbs, but any chicken under four pounds will work just fine.  It’s very important that these chickens be small – the high roasting temperature will not work on a larger chicken, and it’s this high temp roasting that will crisp the skin while keeping the meat inside tender and juicy.  I tend to use fryer chickens – as they tend fall into our ideal weight range. 

You’ll need the advance time for what’s called dry-brining.  You rub seasoned salt into the skin and inside ahead of time, so that the moisture gets sucked out of the skin, resulting in flavorful, crispy skin.
Seasoning the chicken:
  1. Remove the chicken from its packaging.  Take out any giblets – either discard or use for your own purposes if you want.  Then cut the tail and any leftover neck bone and discard. Rinse and pat dry – keep it as dry as possible – a wet chicken will stick to the pan and steam instead of roasting.
  2. Prepare your herb springs.  I use sage leaves, rosemary, and thyme.  I made six bundles for each chicken – two on both thighs, two for each side of the breast, and two on the back. I use a one to two inch spring of rosemary, fold up a few sprigs of thyme, and wrap it all up with a sage leaf. 
  3. Approaching from the cavity, use your finger to gently loosen the skin and make two pockets on either side of the breast, and then a pocket on each thigh.  Then, approaching from the much smaller neck cavity, loosen two pocket on either side of the back.
  4. Insert each bundle rosemary stem first.


Season the chicken with about one teaspoon of salt per pound of chicken.
You’ll want a ratio of two parts salt to one part pepper.  The original recipe calls for cracked black pepper, but I like to use equal amounts of black and white pepper.  I also add some garlic powder, since we like that stuff in our family, and garlic just seems to go hand in hand with chicken.
So for each pound of chicken, I use:
1 teaspoon coarse salt or sea salt.
¼ teaspoon black pepper
¼ teaspoon white pepper
(And about 1/8 teaspoon for the entire chicken, so don’t multiply this for the entire chicken or you’ll overwhelm the other seasonings!)

  1. Mix the salt and spices together in a separate bowl, then pat the chicken dry again.  I use one bowl of seasoning for each chicken – it makes measuring it all out much easier – this is already a fussy process, no need to make it harder for yourself!
  2. Season each chicken liberally, rubbing the stuff in wherever you sprinkle it.  Pay particular attention to the thicker parts like the breasts, back, and thighs.  Rub some into the cavity, and take care with the wings – when you serve them they can be eaten like sauced up wings.
  3. Twist and tuck the wing-tips behind the shoulders. 
  4. Once you’ve seasoned the chicken/s, place them on a baking sheet lined thoroughly with paper towels.  Drape a cloth towel over your chickens, and place in the fridge to sit overnight for one to two days.  You’ll need to pat the chicken dry at least twice a day, as the salt will naturally draw out the moisture in the skin.
  5. Congratulate yourself – the hard part is now over.
  6. Be sure to wash your hands and disinfect your counter tops when you’re done!


One to two days later, time to roast!
  1. Get out a deep, flameproof roasting pan.  The other recipes call for a shallow pan, but I find a deeper one will catch more of the hot fat spatters.  We could all use less spatter burns on our arms, yes?
  2. Pop the pan into the oven and preheat the oven to 475 degrees Fahrenheit.  The original recipe calls for heating the pan on the stove, but why do that when the oven can do the work for you?
  3. When your pan and the oven are both hot, take the pan out, and with your prepped, re-patted dry chicken, and set it onto the pan breast-side up.  It should sizzle.
  4. Put the pan into the oven.
  5. After twenty minutes, the skin should have started browning and blistering.  If it hasn’t turn the temperature up until it does.  If the chicken begins to smoke or blacken, reduce the oven temperature by 25 degrees.
  6. Continue to roast breast-side up for another thirty minutes.
  7. Remove from oven and turn over, breast-side down.  Properly drying ahead of time should keep the skin from sticking to the pan.  Roast in the oven for ten to twenty minutes more.  You’ll know to turn it over when a meat thermometer stuck in the thigh reads 180 degrees Fahrenheit.
  8. Now turn over, breast-side up for five to ten minutes to recrisp the skin on this side.
  9. Once you’ve done that, remove from oven, place chickens on a cutting board to rest for no more than thirty minutes.  Do NOT slash the skin – keep the lovely juices inside the skin to absorb into the meat!


Here is a quick cheat sheet for when your chicken is in the oven, so you don’t need to scour the recipe while you’re working:
Breast side UP = 20 min
Breast-side UP, starting to brown and blister = 30 minutes more.
Breast-side DOWN = 10 to 20 minutes.  Check thigh with meat thermometer = 180 degrees F.
Breast-side UP = 5 to 10 minutes to recrisp the skin on this side.
Remove from oven, let rest up to 30 minutes.  Do not slash skin.

  1. While the chicken is resting, deglaze the pan to use all those fantastic crunchy brown bits left over.
  2. While the pan is still hot, pour in one 187ml bottle of white wine.  Wait for the spatters to die down, then scrape the bottom of the pan with a stiff heat-proof spatula, swirling as you scrape.  The brown bits and grease should dissolve into the wine.  Pour the deglazed wine into a saucepan. 
  3. Deglaze again with a similar amount of chicken stock, and once more pour into the saucepan. 
  4. Add more stock to the saucepan, and start to reduce.  There is no need to add any seasonings – the dry-brine from the chicken skin will add all the flavor you need!
  5. Slowly add lemon juice, to cut the richness of the sauce with a little acidic brightness.  It’s really up to you how much lemon juice you want to add, so start with a little at first to be conservative, and add more to your liking.
  6. Reduce the sauce by half.
  7. Thicken with flour slurry style – take a tablespoon of flour, whisk in a little hot stock from the saucepan until smooth, and then pour into saucepan.  If it’s still not thick enough for you, add more slurry.  Cook until it has reached the desired consistency.  The slurry adds a shiny glossiness to the sauce that making a roux will not.

Serve with the chicken!


Stock –
Once you’ve eaten all the roast chicken, save the bones, gristle, and any skin left over (unlikely, since it’s so flavorful and crispy!).  Add carrots, onions, celery, and water – boil until you’re happy with it.  Again, no need to season!

If you don’t need to use your stock right away, I like to reduce the stock to a sixth of its former volume.
I then pour it into ice cube trays or mini muffin trays, and refrigerate until its jellified.
I wrap each cube in saran wrap, pack up in a big Ziploc bag, and freeze. 

When you need an infusion of flavor, just whip one of these out for rice, stir fry, soups, anything!